As an Amazon Associate, we earn from qualifying purchases. Some links on this site are affiliate links at no extra cost to you. Our recommendations are based on thorough research and editorial judgment.
How to Draw Headphones: A Step-by-Step Guide for Beginners
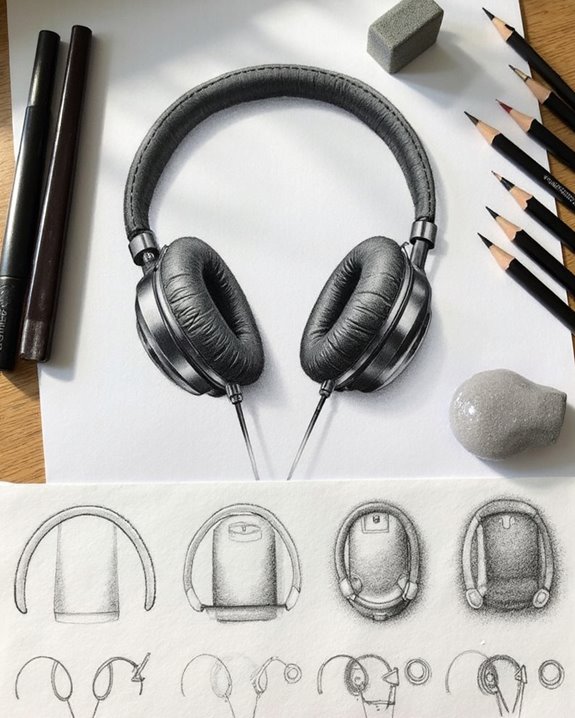
Drawing headphones begins with understanding their basic anatomy: drivers, housing, and headband. Start by sketching simple shapes—a curved line for the headband and circles for ear cups—using HB and 2B pencils for varying line weights. Position elements symmetrically, then add details like cushioning, speakers, and control buttons. Apply shading techniques to create dimension, considering light source direction for realistic shadows. A fineliner pen can define crisp outlines before adding optional color. The following steps will transform basic outlines into professional-looking headphone illustrations.
Key Takeaways
- Start by sketching basic shapes: a curved line for the headband and two circles for ear cups positioned symmetrically.
- Draw parallel lines for the headband’s width, connecting them to the ear cups while maintaining consistent proportions.
- Add details like ear cushions, speaker grills, and cables or wireless components depending on headphone type.
- Create dimension through shading, identifying a light source and adding appropriate shadows to curved surfaces.
- Refine your drawing with details like control buttons, texture on ear pads, and brand logos for realistic finishing touches.
Understanding Basic Headphone Anatomy
Knowledge of headphone components forms the foundation for creating accurate drawings. Artists should familiarize themselves with the primary structures before attempting to sketch headphones.
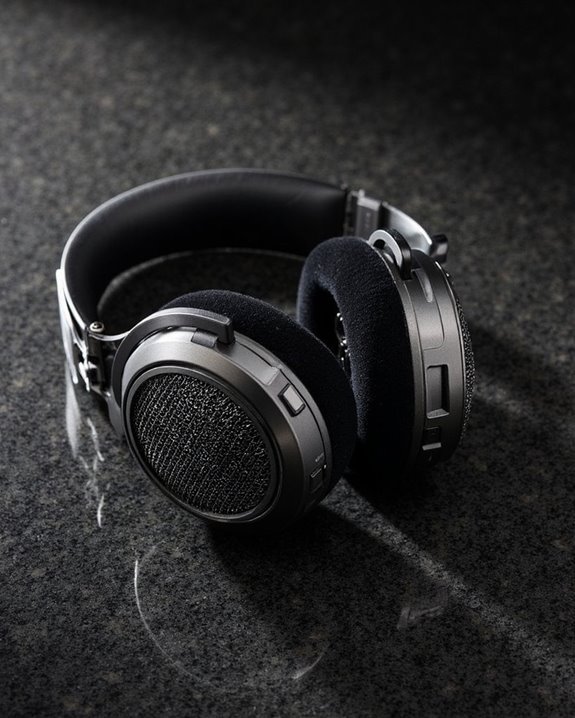
Most headphones consist of several key elements: the drivers (sound-producing units), housing (outer casing), cushioning (earpads), and connection mechanisms. The headband joins the two earpieces, while adjustable arms allow for proper fitting to different head sizes.
Audio drivers, located inside each earpiece, represent the core technology that converts electrical signals into sound waves through a diaphragm and voice coil system. Understanding these component functions helps artists determine which details to emphasize in their drawings.
For over-ear designs, pay attention to the relationship between the headband curve and earpiece positioning. For in-ear models, focus on the angled drivers and ergonomic shape that fits the ear canal.
Many modern over-ear headphones also feature memory foam ear cushions that adapt to the ear shape, providing comfort and influencing the external form artists should capture.
Gathering the Right Drawing Tools
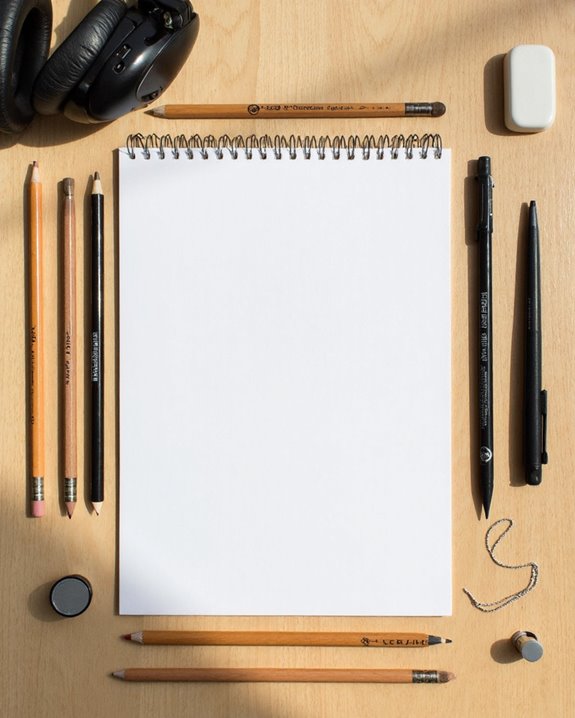
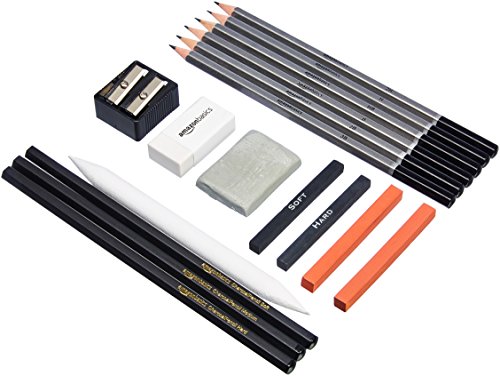
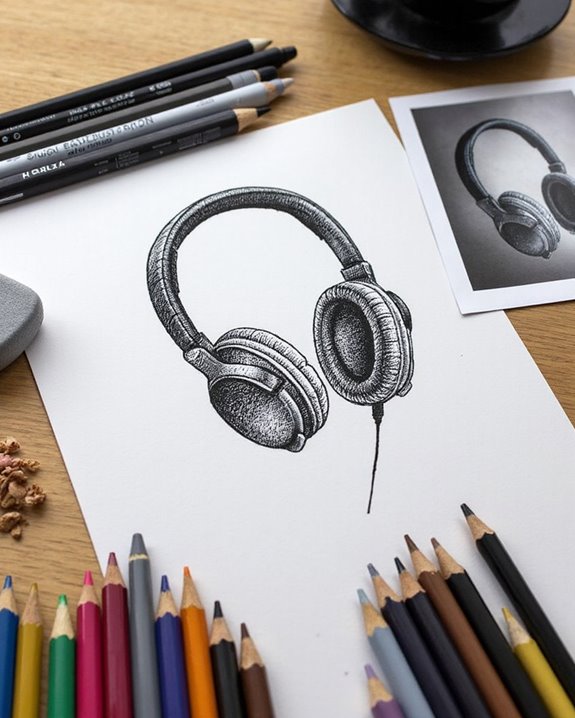
With a solid grasp of headphone anatomy established, artists must next acquire the proper drawing implements to accurately capture these audio devices on paper. A basic set of graphite pencils (HB, 2B, and 4B) provides essential line weight variation for headphone contours and details. Complementing these, a quality fineliner pen (0.3-0.5mm) helps define crisp outlines, with Sakura Micron offering superior performance compared to budget alternatives.
Tool maintenance greatly impacts drawing quality—regular pencil sharpening and proper pen storage prevent inconsistent lines and premature drying. Artists should also procure a kneadable eraser for precision corrections and a white eraser for complete mark removal. For beginners, an affordable 60lb sketchbook provides adequate surface texture without the hefty price tag of premium drawing papers.
Recommended Products

PORTABLE ALL-IN-ONE DESIGN: Thin, lightweight frame houses a creative studio powered by Android 15 OS w/included creative apps plus Google Play Store access - take professional-grade digital art anywhere without extra equipment
All-in-one 17-piece drawing and sketch supply kit for artists of all skill levels

Perfect For All dry media, most writing instruments, colored pencil and graphite, travel or Plein air work, journaling your thoughts and ideas, traveling, sketching, gifts
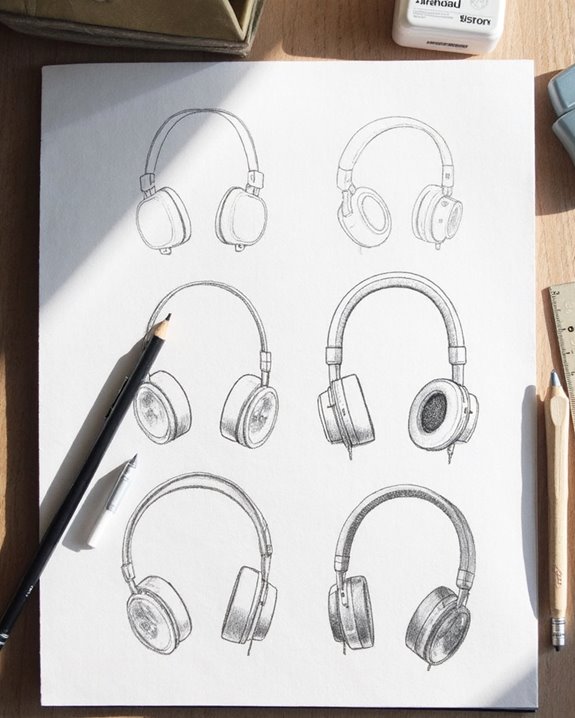
Starting With Simple Shapes and Outlines
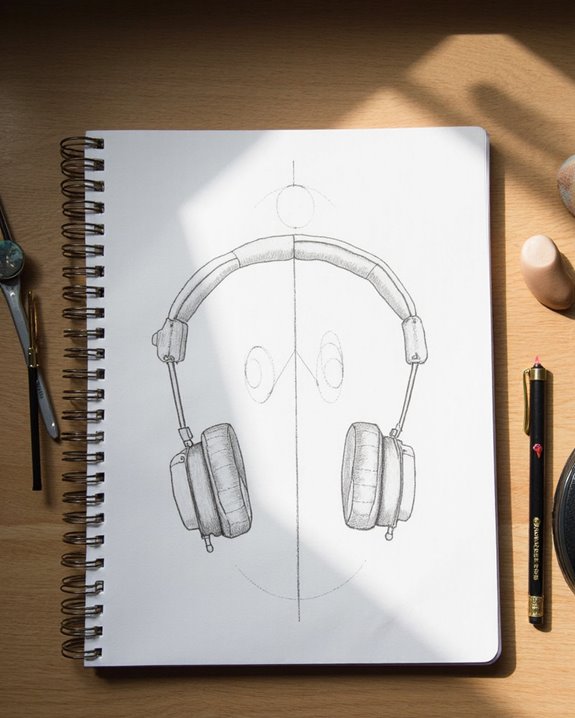
Approaching headphone illustration begins with breaking down these audio devices into their fundamental geometric components. The Shape Basics consist of a curved headband represented by two parallel lines, and ear cups formed from basic geometric shapes like circles or ovals. Artists should position these elements symmetrically to achieve a balanced appearance.
Outline Methods involve first establishing the headband’s curve, then adding ear cups at each end. Maintaining consistent proportions between components creates a realistic framework. When sketching the ear cups, half-circles or rectangles provide an effective foundation before adding padding details.
For beginners, starting with a side or front view simplifies the process. Once the basic structure is established, artists can gradually incorporate more complex elements like adjustment mechanisms and speaker grills while preserving the overall symmetry.
Recommended Products

MADE TO MAKE IT EASY The most all-inclusive ever drawing and sketching set - in robust, gift worthy, zipper case; unfolds into organized sections which stand up for simple selection; carry-anywhere functionality.

The Kird Barken 240 PCS art set is designed to meet every creative need, from sketching and coloring to blending and painting. This extensive kit includes graphite, colored, charcoal, watercolor, metallic, fluorescent, and rainbow pencils—plus a 24-color watercolor palette, sketchbook, and coloring book. Crafted for artists, students, and beginners, it provides the ultimate versatility and performance for any artistic style or skill level.

【Complete Drawing Pencils for Sketching】HIFORNY 126 pcs sketching & drawing set includes 24 premium sharpened graphite pencils(14B,12B,10B,9B,8B,7B,6B×2 ,5B,4B×2,3B,2B×3,B,HB×2,F,H,2H,3H,4H,5H),24 colored charcoal pencils,3 black charcoal pencils(soft,medium,hard),3 white charcoal pencils(soft,medium,hard),3 woodless graphite pencils(2B,4B,6B),3 graphite and 3 charcoal sticks,6 pastels sticks,4 willow charcoal sticks,3 gel pen(white/gold/silver),1 eraser pencil with brush,1 marker pen,1 dotting pen.Each pencil is marked with name and model,perfect for drawing,sketching,shading,layering,blending,and more.
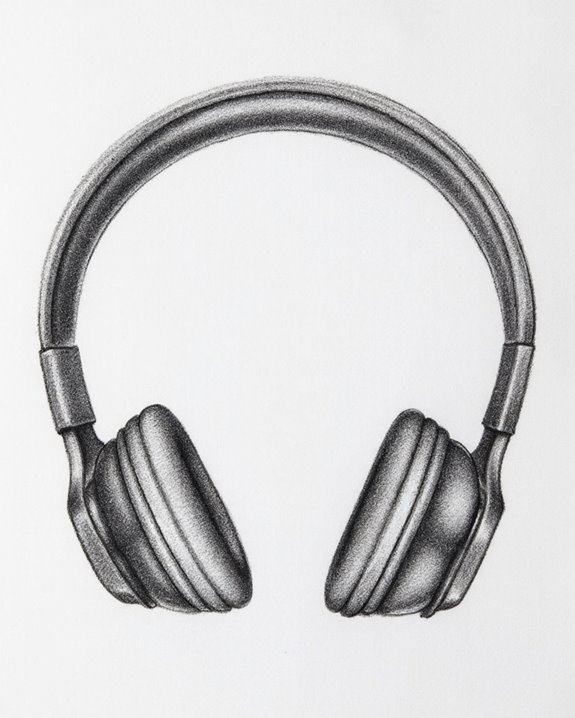
Drawing the Ear Cups and Speakers

After establishing the basic framework of headphones, artists can focus on the intricate details of ear cups and speakers that bring illustrations to life. When drawing ear cups, consider their rounded shape designed to encase the ears comfortably. Different materials—plastic, metal, or wood—affect both aesthetics and implied sound quality.
The internal speakers require technical accuracy. Depict the driver components: diaphragm, magnet coils, and surrounding structure. These elements control sound wave propagation from speaker to ear. Artists should pay attention to how drivers align within the cups for realistic portrayal.
Add texture through careful shading of padding materials and speaker grills. Consider light reflection on smooth surfaces and precise detailing of mechanical components. Maintain symmetry between left and right cups while accurately representing scale and proportion.
Including details such as 50mm neodymium drivers can enhance the technical authenticity of your headphone drawings.
Creating the Headband and Connectors
The headband forms the critical structural element that connects the ear cups while providing stability and comfort during use. When drawing headphones, depict the headband with a consistent curvature that arcs naturally over the head. Material selection impacts both the appearance and functionality—titanium and aluminum offer sleek, durable options while leather adds a premium aesthetic touch.
For connectors, illustrate the cable entry points at the base of each ear cup. These junctions should appear secure and intentional in your drawing. Connector durability is best represented by drawing reinforced cable entries and gold-plated plugs. Standard headphone connections include:
- Y-type cables that split to each ear cup
- Straight or angled plugs at the device end
- Cable management features like sliding adjusters
Including features such as gold-plated plugs can enhance both the durability and audio quality of wired headphones.
Adding Details and Controls
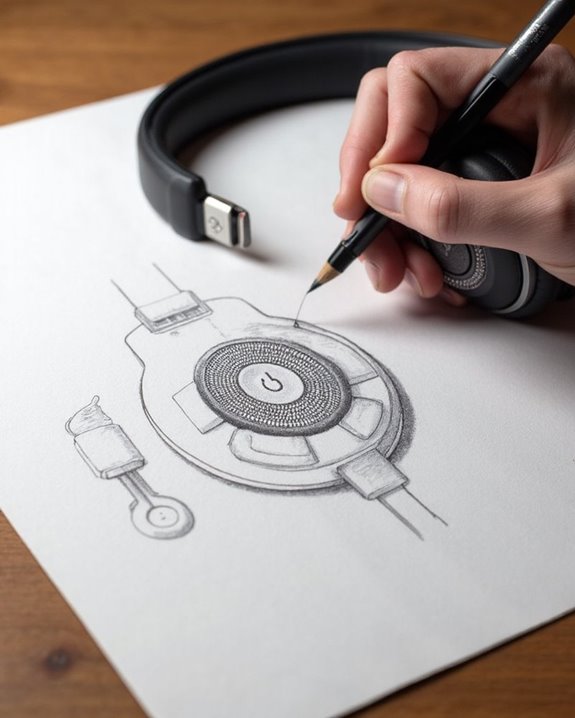
Realistic headphone illustrations require precise attention to functional elements that transform basic shapes into recognizable audio devices. Artists should incorporate control buttons as small circles or rounded rectangles on the ear cups, positioning them in ergonomic design patterns that mimic actual headphone layouts.
For wireless features, include power buttons and charging ports on the lower sections of ear cups. Volume controls and playback buttons should be grouped logically, often with plus/minus symbols or standard media icons for authenticity. These elements require subtle shading to create dimension against the main body.
Add textural elements by incorporating switch bases, slider grooves, and microphone slots as needed. Refined details like indicator lights and input jacks contribute greatly to the illustration’s realism while maintaining appropriate proportions between controls and the overall headphone structure.
Mastering Shading and Texturing Techniques
Once all the control elements and functional details have been established, proper shading and texturing transform a flat headphone drawing into a compelling, three-dimensional representation. Artists should first identify the light source direction to accurately place shadows and highlights across the headphones’ surfaces.
Blending techniques are essential for creating realistic dimension. Using tools like blending stumps helps smooth gradations between light and dark areas, particularly effective when rendering plastic or leather headphone components. Artists can build depth through layering with different pencil grades (HB through 6B).
Texture experiments reveal the unique characteristics of headphone materials. Hatching works well for fabric elements, while stippling effectively captures speaker mesh details. Regular practice with these techniques creates increasingly realistic renderings, especially when artists study real headphones to understand how light interacts with various surfaces.
Applying Color and Final Touches
Bringing headphone illustrations to life requires thoughtful color application that transforms simple outlines into realistic representations. Artists can select from various mediums including markers for bold coverage, colored pencils for precise control, or acrylics for opaque finishes. Each medium offers distinct advantages when developing personalized color palettes.
To create dimension, artists should establish base colors before adding highlights and shadows. Subtle color variations simulate light reflection on glossy ear cups, while fine lines mimic mesh textures. For maximum realism, incorporating brand logos and contrasting details enhances authenticity.
Finishing techniques elevate the final artwork. Clean stray marks for crisp outlines, apply fixative spray to prevent smudging, and add sharp highlights with white gel pens. These final touches create professional-looking headphone illustrations with depth and dimensionality that capture both form and function.
Frequently Asked Questions
How Do I Fix Perspective Errors When My Headphones Look Unbalanced?
Like a tightrope walker adjusting their pole, artists correct unbalanced headphones through perspective correction techniques. Using reference points, guidelines, and balance techniques such as ellipses rather than circles maintains proper proportions and visual harmony.
Can I Draw Headphones Effectively Without Using Reference Photos?
While possible through Memory Drawing and Imagination Practice, drawing headphones without references typically yields less accurate results. References help beginners capture complex curves and proportions that are difficult to visualize from memory alone.
How Do I Draw Transparent or See-Through Headphone Components?
Over 65% of designers struggle with transparency renderings. To draw see-through headphone components, artists must master Transparency Techniques like layering thin lines and Refraction Effects through strategic highlighting of curved edges and internal structures.
What Techniques Show Wireless Technology in Headphone Illustrations?
Artists depict wireless technology through signal depiction using wave patterns or Bluetooth symbols. Wireless elements like battery indicators and stylized transmission lines effectively communicate connectivity without cords, often enhanced with subtle glow effects.
How Do I Draw People Wearing Headphones With Proper Proportion?
While Michelangelo never fretted over AirPods, artists should position headphones at ear-level with cushions fully covering ears. Anatomy Integration requires aligning the headband with eyebrows, while Figure Scaling guarantees proportional sizing to the head shape.